The first week on a new job can feel like learning the “rhythm” of a place. You figure out where tools live, how break times actually work, and which doors are always locked. In that early fog, safety details can blur, even for smart, careful people. I still remember walking a new hire through a maintenance room years ago, watching them reach for a spray bottle like it was harmless window cleaner. The label was worn, the scent was sharp, and the risk was real. That moment stuck with me because it wasn’t reckless—it was unfamiliarity.
Chemical safety training works best when it meets new hires where they are: eager to do well, moving fast, and sometimes hesitant to ask “basic” questions. A good onboarding plan doesn’t bury them in rules on Day 1. It builds confidence step by step, turns the workspace into a readable map, and sets habits that hold up when the day gets busy.
This is why a GHS HazCom course is so valuable during onboarding. It equips new hires with the skills to read chemical labels, interpret Safety Data Sheets (SDS), and recognize hazards before they become incidents. Coupled with hands-on demonstrations and a clear system for asking questions, even a “7-day plan” can lay the foundation for safe, confident work that lasts far beyond the first week.
Why A 7-Day Plan Beats A One-Time Orientation
New-hire incidents often cluster early. Many safety teams see higher error rates in the first month because people are still learning names, workflows, and expectations at the same time. When chemical handling gets layered on top of that, small misunderstandings can lead to skin exposure, inhalation risks, damaged surfaces, or cross-contamination.
A 7-day plan spreads learning across real work moments. It gives managers time to observe behavior, correct small gaps early, and reinforce what “good” looks like. It also builds a shared language, so new hires feel comfortable saying things like “I’m not sure what this reacts with” before a mistake happens.
Before Day 1: Set The Stage With Smart Prep
Before the new hire arrives, the worksite should be ready to teach. If labels are peeling, secondary containers are unlabeled, or PPE is scattered, the environment teaches the wrong lesson: “We wing it here.” A few hours of preparation saves days of rework and reduces early risk.
Preparation also signals respect. When a new hire sees a clear station setup, updated documents, and a supervisor who knows the plan, they lean in. They stop guessing and start following a pattern that has been built for them.
Here are prep steps that pay off fast:
- Confirm the list of chemicals the role will touch, including cleaners, lubricants, solvents, and maintenance products.
- Check that Safety Data Sheets are accessible where the work happens, not hidden in a back office.
- Inspect labeling and replace worn labels on primary and secondary containers.
- Stage role-specific PPE at the point of use (not “somewhere in the building”).
- Pick a mentor for shadowing who follows procedures consistently.
Day 1: Orientation That Focuses On Real Hazards
Day 1 sets the tone. The goal is not to turn a new hire into a chemist. It’s to help them recognize what belongs in the “respect this” category and where to find answers when they’re unsure. Start with the areas they will actually use, not the whole facility at once.
Make the first day feel practical. Walk the route they’ll walk. Point out where chemicals are stored, where mixing happens (if it happens), and where exposures could occur. Describe hazards in plain language: what can burn skin, what can irritate lungs, what can react when combined, and what must never be transferred into an unlabeled container.
Cover these Day 1 essentials:
- Where chemicals are stored, who has access, and what “closed and returned” means
- The difference between “daily-use” products and restricted-use products
- Basic PPE expectations for the role and how to check fit and condition
- What to do immediately after a splash, spill, or unexpected reaction
- How to report issues without fear of blame
Day 2: Build Fluency With Labels And Safety Data Sheets
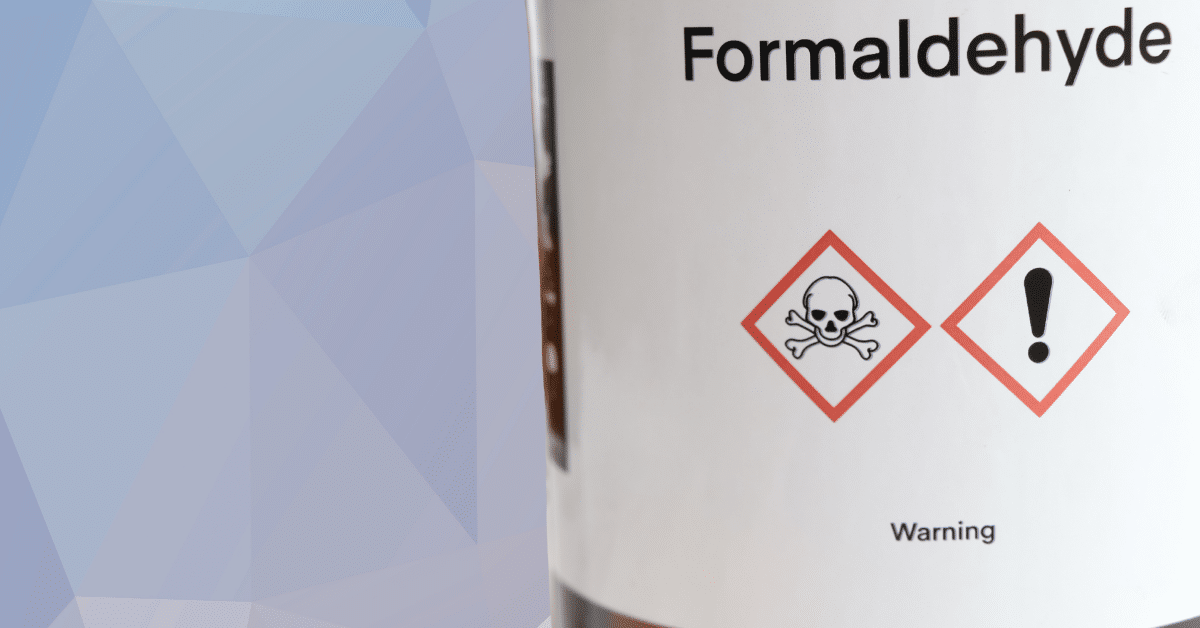
Day 2 is about reading the workplace like a set of road signs. Labels and Safety Data Sheets are not paperwork for audits. They are the “instructions on the box” for real risk. When new hires can interpret key label elements, they make better decisions without waiting for permission.
Start with a short, guided exercise using products they will touch this week. Have them locate hazard statements, pictograms, first-aid basics, and storage notes. Then walk to the storage area and match what the label says to what the site actually does. If there’s a mismatch, treat it as a fixable process gap, not a lesson in shame.
A quick practice flow works well:
- Pick two common chemicals for the role
- Review the label together and name the main exposure risks
- Open the SDS and find first aid, handling, and disposal notes
- Ask the new hire to explain back, in their own words, what precautions they’d take
- Reinforce where to find SDS access during a busy shift
Day 3: Teach Safe Handling Through Hands-On Demonstration
By Day 3, new hires are usually ready to do more than watch. This is when you connect knowledge to muscle memory: how to pour, how to measure, how to wipe, how to cap, and how to avoid contamination. It’s like learning to drive. Reading a manual helps, but practice is what makes it real.
Use a structured demonstration: show it once, explain it, then have the new hire do it while you observe. Keep the focus on a few repeatable habits that prevent most issues. If your role involves dilution or mixing, this is also the day to reinforce “no improvising.” Even well-intended adjustments can create reactions or weaken effectiveness.
Hands-on habits to coach:
- Open containers slowly and away from the face
- Keep caps and lids off surfaces that could get contaminated
- Use dedicated tools for chemicals (no shared scoops or unlabeled squeeze bottles)
- Avoid “topping off” partially filled containers unless your process allows it
- Wash hands after glove removal, even if no contact is suspected
Day 4: Storage, Segregation, And The Hidden Risks Of “Normal”
Day 4 zooms in on where problems quietly build: storage areas, secondary containers, and “temporary” habits that become permanent. A bottle left near a heat source, a rag soaked and tossed in the wrong bin, or incompatible products stored side-by-side can create real hazards without anyone noticing until it’s too late.
This is also the day to talk about the psychology of routine. When something feels normal, people stop seeing it. Help new hires keep their eyes fresh by teaching them what “doesn’t belong.” Walk the storage area together and discuss why certain shelves exist, why ventilation matters, and why some chemicals stay locked or isolated.
To anchor the lesson, introduce a simple process tool: workplace chemical safety checklist. Explain that it’s not about perfection. It’s a quick scan that catches drift: missing labels, open containers, overflowing bins, and PPE gaps before they become incidents.
Day 5: Spill Response And Exposure Actions People Can Remember
Day 5 should feel like emergency readiness without panic. New hires need a short, memorable script for spills and exposures, because high-stress moments compress decision-making. If the plan is too complex, people freeze or guess.
Run a scenario that matches your environment: a small spill at a workstation, a splash on gloves, or a leaking container found in storage. Keep it realistic and role-appropriate. Then review what “good response” looks like: isolate, alert, protect, clean using the right kit, and report. If your site has different spill kits, show where they are and what they contain.
A practical spill and exposure approach:
- Stop the task and keep others away from the area
- Identify the product and check label and SDS guidance
- Put on the right PPE before cleaning or containing
- Use the spill kit materials suited for that product type
- Report the event, even if it feels minor, so patterns can be tracked
Day 6: Connect Chemical Safety To The Wider Compliance Culture
By Day 6, you can connect chemical safety to the bigger “how we work here” story. This matters because safety practices don’t live in a separate box. They show up in communication, respect, and accountability. When the culture supports speaking up, hazards get addressed earlier.
Close Day 6 with a short manager check-in. Ask the new hire what still feels unclear and what they’ve noticed in the environment. Treat their questions like useful data, because new hires often spot issues that long-time staff have learned to ignore.
Day 7: Validate Competency And Lock In The Habits
Day 7 is where you confirm readiness. This is not a “gotcha” test. It’s a confidence-building review that protects the new hire and your team. Think of it like fastening the last button before a shift: small, quick checks that keep the day from unraveling.
Use a short competency validation that combines explanation and demonstration. Have the new hire walk through a task, identify the chemical, describe hazards, choose PPE, and explain what they would do if something goes wrong. Then give specific feedback, including what they did well. People repeat what gets noticed.
A simple Day 7 validation can include:
- Locate the correct product and confirm the label matches the task
- Explain key hazards and the safest handling method
- Demonstrate proper PPE use and glove removal
- Show where the SDS is located and how to find first-aid guidance
- Describe spill response steps for a small, common scenario
Common Mistakes New Hires Make And How To Prevent Them
Most chemical safety issues don’t come from bad intent. They come from rushed work, unclear ownership, and small shortcuts that feel harmless. A new hire may copy what they see, even if what they see is imperfect. That’s why early coaching matters.
One of the most preventable mistakes is using an unlabeled secondary container. Another is “mixing to improve performance,” like adding extra cleaner for a tougher mess. The fix is clear standards, visible labeling tools, and supervisors who correct drift in the moment, calmly and consistently.
Practical prevention tactics:
- Make labeling supplies easy to access at the point of use
- Post role-specific PPE expectations where the task happens
- Assign one person per shift to check storage order and container condition
- Use quick coaching phrases like “Pause and label that before you set it down”
- Recognize good habits publicly so the standard becomes social
Measuring Success After The First Week
A 7-day plan should create results you can see. Look for fewer “mystery containers,” fewer last-minute PPE scrambles, and better questions from new hires. Strong onboarding often changes the quality of questions from “Where is it?” to “Is this compatible with that?” That’s a meaningful shift.
Tracking doesn’t have to be complicated. A short weekly manager note, near-miss reporting trends, and periodic spot checks can show whether habits are sticking. If patterns show repeated confusion around one product or process, adjust the onboarding content rather than blaming individuals.
Conclusion
A strong chemical safety onboarding plan is like building a handrail on a staircase. Most days, no one thinks about it. Then one day, someone slips, and that handrail becomes the reason the story ends well. Training new hires across seven focused days turns chemical safety from a binder topic into a daily habit: readable labels, consistent PPE, smart storage, confident response to spills, and a culture where speaking up is normal.
If you manage onboarding, pick one improvement you can make before the next start date: fix labeling drift, tighten spill kit access, or formalize Day 7 validation. Small upgrades compound quickly when every new hire learns the same safe rhythm from the start.
FAQ
How Long Should Training New Hires On Chemical Safety Take?
A solid foundation can be built in one week when learning is spread across real tasks instead of a single lecture. The 7-day format gives new hires repetition, practice, and feedback while they’re still forming habits. If the role involves frequent chemical handling or higher-risk products, keep coaching active in weeks two and three with short refreshers and quick spot checks.
What Should A New Hire Learn First About Chemical Safety?
Start with what they will touch in their first shifts: where products are stored, how to read labels, what PPE is required, and where Safety Data Sheets live. Training new hires on chemical safety works best when early lessons are tied to real work areas, not generic slides. When people can identify hazards fast, they make safer choices even when the day speeds up.
What If The Workplace Has Many Different Chemicals?
Prioritize by role. New hires don’t need to learn every chemical on site during week one. Focus training on the products they use daily, then introduce occasional-use products later with a mentor present. Keep Safety Data Sheets easy to access and reinforce the habit of checking before use. Training new hires on chemical safety scales better when it’s staged and role-specific.
How Often Should Chemical Safety Training Be Refreshed?
Short refreshers work better than rare marathon sessions. After onboarding, plan quick check-ins at 30, 60, and 90 days, plus refreshers when new products or processes are introduced. Near-miss trends can also signal when a refresher is needed. Training new hires on chemical safety isn’t a one-time event; it’s a routine that stays strong through repetition and coaching.