In that moment, it was clear that we did not just need more rules; we needed a new approach. We needed a shared language for hazards, labels everyone could read at a glance, and a habit of checking the Safety Data Sheet before anyone opened a valve.
That is precisely what a solid GHS and Hazard Communication training course is designed to build: confidence, shared habits, and everyday decisions that keep people safe and the business compliant.
What Hazard Communication Training Really Teaches
At its core, hazard communication training teaches workers how to recognize and control chemical risks in their actual work environments. Employees learn how to:
- Identify physical and health hazards associated with the chemicals they use
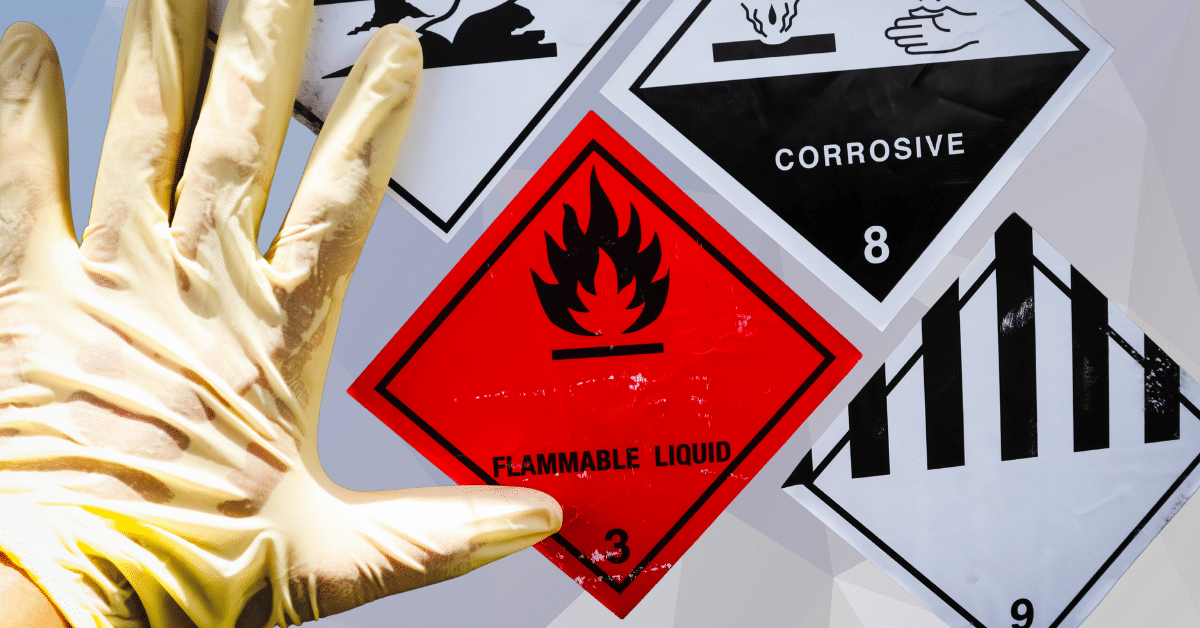
- Read and apply label information and pictograms.
- Find and interpret Safety Data Sheets (SDS)
- Follow the company’s written Hazard Communication (HazCom) program and local procedures.
Anyone who works with or around hazardous chemicals should receive this education upon hire, when new products are introduced, and whenever knowledge gaps are identified. The goal is not to memorize acronyms. It aims to provide people with a reliable playbook they can use in the field.
OSHA Hazard Communication Training and Why It Matters
A strong program aligned with federal requirements delivers two significant benefits: fewer incidents and fewer citations. Hazard communication remains one of the most frequently cited safety standards because gaps are easy for inspectors to see, such as missing labels, outdated SDSs, and training that only exists on sign-in sheets.
When you invest in a structured approach, you close those gaps and turn passive awareness into confident action. When a worker recognizes a respiratory hazard and immediately reaches for the correct protection without being told, you reduce risk, avoid downtime, and protect productivity all at once.
Some quick, measurable gains include:
- Clear secondary container labels that eliminate “mystery bottles”
- Fast access to SDSs, which speeds incident response and medical care
- A consistent understanding of pictograms reduces hesitation in fast-paced work.
- Regular refreshers that keep new hazards from slipping through the cracks
What Effective Training Actually Covers
A single slideshow is not enough to change behavior. High-quality programs combine visual literacy, hands-on practice, and site-specific examples, enabling people to connect the concepts to their own tasks.
At a minimum, your curriculum should address:
- Label elements and pictograms: signal words, hazard statements, precautionary statements, supplier information, and how to read the nine pictograms using real containers from your site
- SDS structure: all 16 sections, with emphasis on handling, storage, exposure controls, first aid, and spill procedures
- Your written program: chemical inventory, responsibilities, training plan, communication with contractors, and how employees obtain SDSs
- Work practice drills: decanting into spray bottles, labeling secondary containers, selecting the right gloves or respirator, and walking through spill response
- Non-routine tasks: how maintenance, shutdown, or turnaround work will be briefed when unfamiliar hazards appear
- Multi-employer settings: who is responsible for sharing what information so hosts, contractors, and temporary staff see the same risk picture
When these topics are combined as GHS and HazCom basics, workers can recognize a hazard in seconds and know what to do next without hesitation.
Role Specific Guidance That Sticks
Training should not look identical for every audience. New hires, experienced technicians, supervisors, and contractors all need different levels of detail and other examples.
For frontline staff, focus on practical steps, such as reading labels, selecting the correct PPE, checking SDSs before first use, and following spill procedures. Many organizations brand this as Hazard Communication for employees, allowing HR and workers to quickly identify the materials intended for them.
Supervisors require additional emphasis on pre-job briefings, controlling ignition sources, verifying ventilation, and documenting refresher training when new chemicals are introduced. Contractors need a focused orientation that covers your chemical inventory, storage areas, and emergency procedures.
When you publish short, role-aware modules rather than one generic session, people are more likely to pay attention because the content clearly fits their work.
How To Build A Practical HazCom Program
A workable hazard communication program does not need to be complicated, but it does need to be active. Here is a practical six-step path you can adapt to any organization:
- Create a photo-based inventory
Walk your areas with a tablet or phone, capture photos of each product and its label, record the location, and attach the latest SDS. This speeds audits and helps new hires learn the layout. - Standardize your label system.
Provide pre-printed secondary labels with the product name, appropriate pictograms, and key precautions. Place a “label station” near mixing or decanting areas so no one has to search. - Make SDS access reliable and straightforward.
Use binders at points of use in high-turnover areas and digital access from phones or kiosks elsewhere. Train people to open the SDS before first use, not after a spill has occurred. - Keep the written program short and specific.
Tie it directly to daily tools such as pre-task plans, hot work permits, confined space permits, and startup checklists. If it is short and practical, people are more likely to follow it. - Plan training and refreshers deliberately
Combine new-hire orientation with task-specific microlearning and brief monthly toolbox talks. Refresh content any time products change or a near-miss highlights a knowledge gap. - Run a feedback loop
Encourage reporting of near-misses and “good catches.” Use those reports to improve labels, drills, and guidance, and recognize people who speak up.
Choosing Training That Fits Your Team
The most effective training format is one that your workforce can actually complete and retain. Mobile crews and dispersed teams typically benefit from on-demand eLearning that can be accessed on phones or tablets. At the same time, laboratory and manufacturing environments often derive more value from a blended approach that combines short online modules with in-bay practice.
When evaluating options, look for courses that clearly explain label elements, pictograms, SDS interpretation, and your responsibilities under the standard. Scenario-based exercises are beneficial because they mirror real-world decisions. For many organizations, a well-structured GHS course for workers becomes the core module that everything else builds on, with brief add-ons for specific tasks or departments.
A Quick Story: From Mystery Bottles To Muscle Memory
One regional facilities team kept discovering unlabeled spray bottles in custodial closets. Rather than blaming people, they rebuilt the system.
They switched to pre-labeled bottles, added a shelf with backup labels, created a one-page SDS “cheat sheet” for the five most used products, and included a two-minute refresher in every shift huddle.
Within a month, spot checks improved from barely more than half of the bottles being labeled correctly to almost every bottle being labeled and stored as intended. Spill-related calls dropped at the same time. The change did not come from a longer policy. It came from making the right action the easiest choice.
Common Mistakes And Better Moves
Even well-intentioned programs can stumble over the same issues. Four of the most common problems are:
- Unlabeled secondary containers
Keep squeeze bottles off the floor by issuing only pre-labeled containers or stocking durable workplace labels that list the product identifier and key hazards, accompanied by the correct pictograms. Add a quick weekly walkthrough to spot-check benches, carts, and utility rooms, and provide on-the-spot coaching when issues are found. - Outdated or missing SDSs
Assign an owner to review the binder or digital library quarterly, compare it to supplier portals, and ensure that you have a current 16-section SDS for every product in use. Archive older versions and ensure access is clear at the point of use and for every shift. - Language barriers
Provide training, labels, and quick-reference cards in the languages your team speaks. Use consistent pictograms to reinforce key messages. Confirm understanding with short teach-backs instead of relying solely on signed attendance sheets. - Training without practice
Incorporate brief drills into toolbox talks: label a secondary container, locate the correct SDS in under a minute, or walk through eyewash procedures after a simulated splash. Track participation and use any mistakes as opportunities for coaching.
KPIs That Show Your Program Is Working
Data helps you see whether your efforts are translating into safer work. A small set of leading indicators is often enough:
- Percentage of secondary containers with correct labels during spot checks
- Time required to access the correct SDS during drills, across all shifts and areas
- Number and type of near-miss reports related to chemical handling, and whether recurring themes are addressed
- Percentage of affected employees retrained within a defined window after new products or formula changes.
- Accuracy of PPE selection observed during routine tasks, compared against SDS recommendations and written procedures.
When these indicators trend in the right direction, incident rates, first-aid cases, and response times usually improve as well.
Legal Requirements In Plain Language
Your program should align with the Hazard Communication Standard in the federal regulations. That means you need:
- A current written program
- A complete and accurate chemical inventory
- Labels that reflect the adopted global classification and communication system
- SDSs that are accessible to employees on every shift
- Training that is timely, understandable, and documented
Keep records of dates, topics, and attendance to demonstrate your training history if an auditor or regulator requests it.
An Action Plan You Can Start This Week
If your current approach needs a boost, begin with visible steps that make work safer immediately:
- Walk one production or maintenance area with your phone and update the inventory with photos
- Set up a label station with pre-printed secondary labels and permanent markers.
- Post clear instructions on how to access SDSs at eye level, where people mix or pour chemicals.
- Add a two-minute pictogram refresher to your next shift kickoff meeting.
- Run a short drill where the team finds the SDS, selects PPE, and states spill steps out loud.
These small, low-cost actions can quickly shift daily habits and demonstrate to employees that hazard communication is more than just paperwork.
FAQ
What is OSHA Hazard Communication training and who needs it?
You’re asking about the baseline program that teaches workers to recognize chemical hazards, read labels and pictograms, and use SDSs correctly. Anyone who works with or near hazardous chemicals needs it at hire and when new hazards appear. Effective programs combine short eLearning sessions with hands-on practice and keep SDS access straightforward. Many companies add GHS safety training refreshers when products or processes change.
How often should OSHA Hazard Communication training be refreshed?
You’re asking about frequency, and the practical answer is: at hire, when you introduce new chemicals or hazards, and whenever observations or near-miss reports show a gap. Many teams schedule brief quarterly touchpoints—such as pictogram drills, labeling checks, or spill practice—and log them as part of their OSHA Hazard Communication training records, with targeted GHS safety training when specific tasks change.
What topics must be covered in OSHA Hazard Communication training?
You’re asking about required content. Cover label elements, GHS pictograms, SDS sections, your written program, chemical inventory, protective equipment, storage/handling, and emergency steps. Site specifics matter: how to obtain SDSs, who to contact, and what to do in the event of spills. Pair formal OSHA Hazard Communication training with practical GHS safety training so workers can perform these steps without hesitation.
Can small businesses deliver effective HazCom without a big budget?
You’re asking if lean teams can do this well. Yes—use photo-based inventories, pre-printed secondary labels, and short toolbox talks. Free or low-cost GHS safety training modules can cover the basics, while supervisors run simple drills in the workspace. Keep SDS access clearly visible, and document each brief refresher as part of your OSHA Hazard Communication training record-keeping.
What’s the difference between GHS and OSHA’s HazCom rule?
You’re asking about the relationship. GHS is a global system for classifying and communicating chemical hazards, including pictograms, labels, and SDS formats. OSHA’s HazCom rule adopts GHS elements in U.S. workplaces and sets expectations for training, labeling, SDS access, and written programs. Good OSHA Hazard Communication training teaches how the GHS elements appear on your actual containers, backed by practical GHS safety training drills.